
Until recently, accounts at Ameriprise were grouped by default settings and couldn’t be changed by clients. Our team added the ability for clients to create their own customized account groups. But this introduced a new wrinkle.
How to differentiate between the Ameriprise-created groups (that can’t be edited) and the client-created groups (that can be edited), and explain their features and restrictions without adding clutter?
We needed a content design that solved a few different problems:
- Identify which account group is the default (the one that’s active when a client first logs in to the website).
- Mark which account groups are visible in the navigation menu.
- Clarify the editing options for each type of account group.
- Include lots of details and definitions without cluttering the page visually.
I had a good relationship with the product owner, so we started the discovery process before his team started coding. A dream come true. We discussed requirements, asked questions, drafted content and design, reviewed with business partners, and iterated quickly over and over again.
The team then built and published a solution that fit everyone’s requirements (including business, product, content, design, and compliance).
Initial state
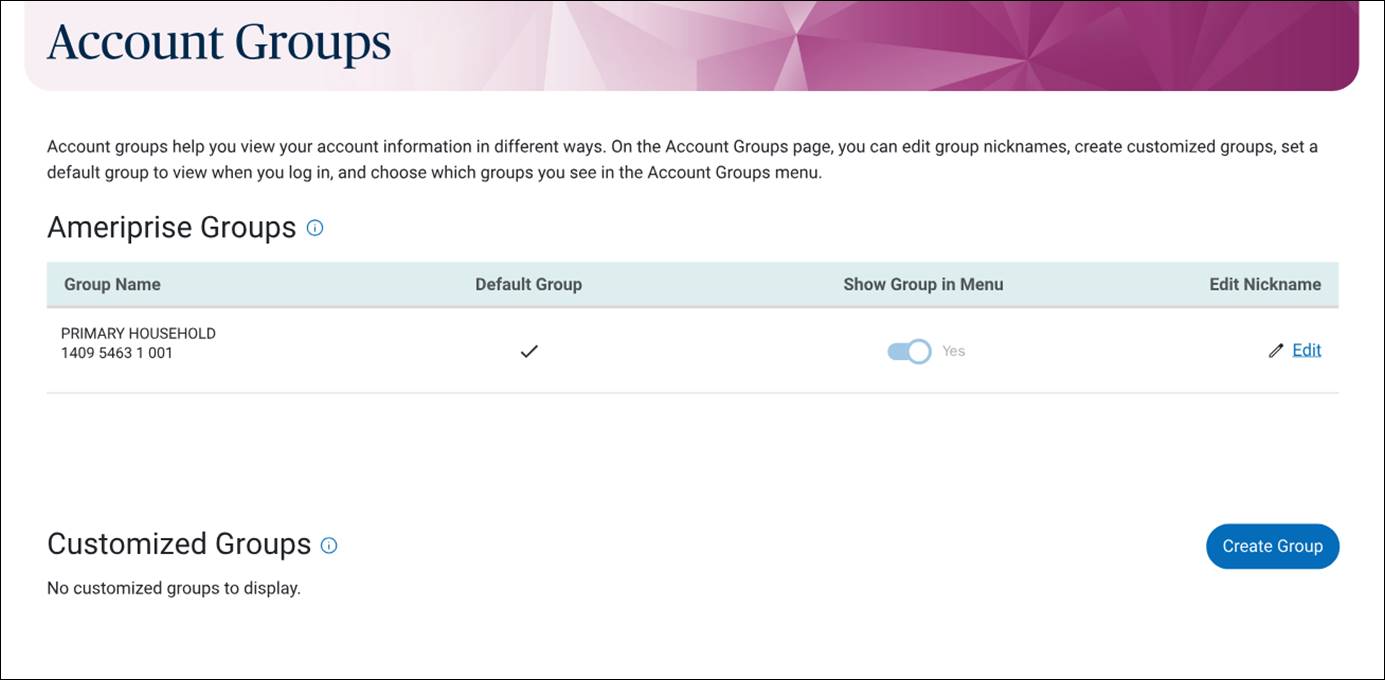
The initial state shows one Ameriprise group and no customized groups. It includes a concise explanation at the top because this is new and most clients aren’t familiar with this page. It also includes microcopy and subtle design cues to guide users at a glance.
Multiple groups
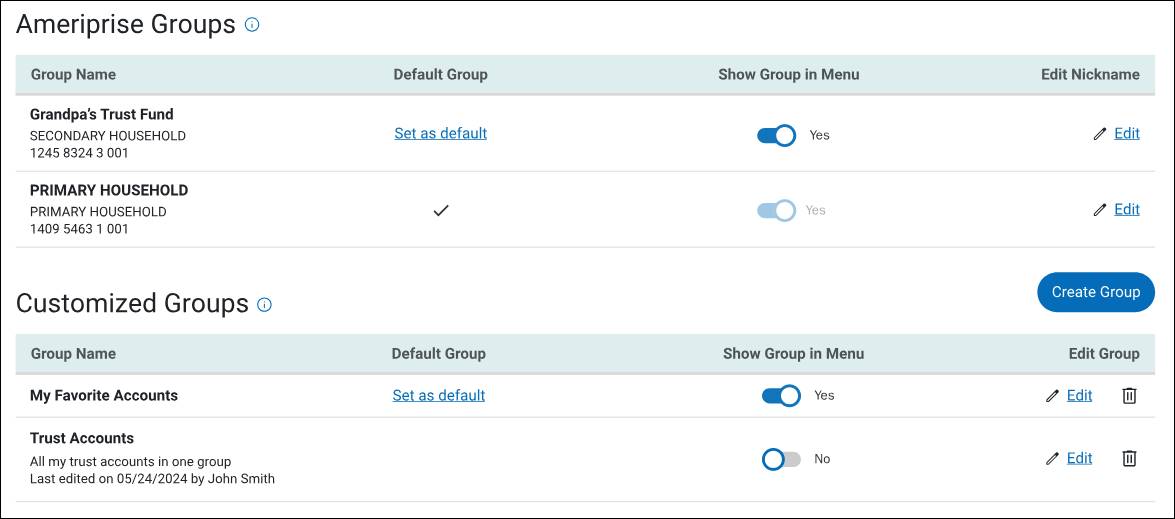
If a client’s portfolio includes multiple account groups (Ameriprise and customized), the layout quickly adds complexity. Our goal was to maximize clarity while minimizing clutter, again using simple microcopy and familiar design cues.
Info bubbles
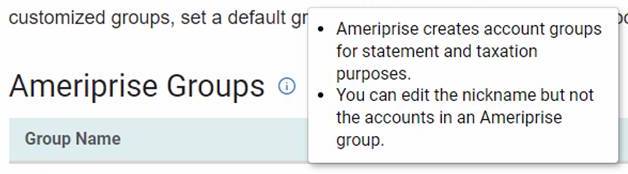
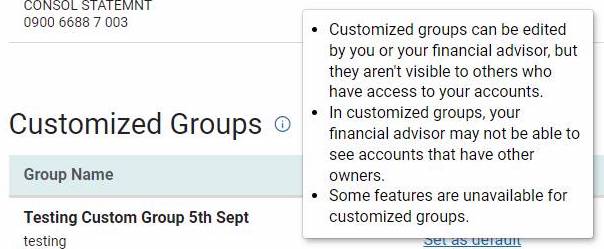
Our business partners wanted to include a lot of extra information for both types of account groups, which added a lot of visual clutter. We rewrote it, cut the word count, added simple bullet points, and “hid” it behind the two info bubbles. The required information was still there, but the clutter was removed.
Customize group details
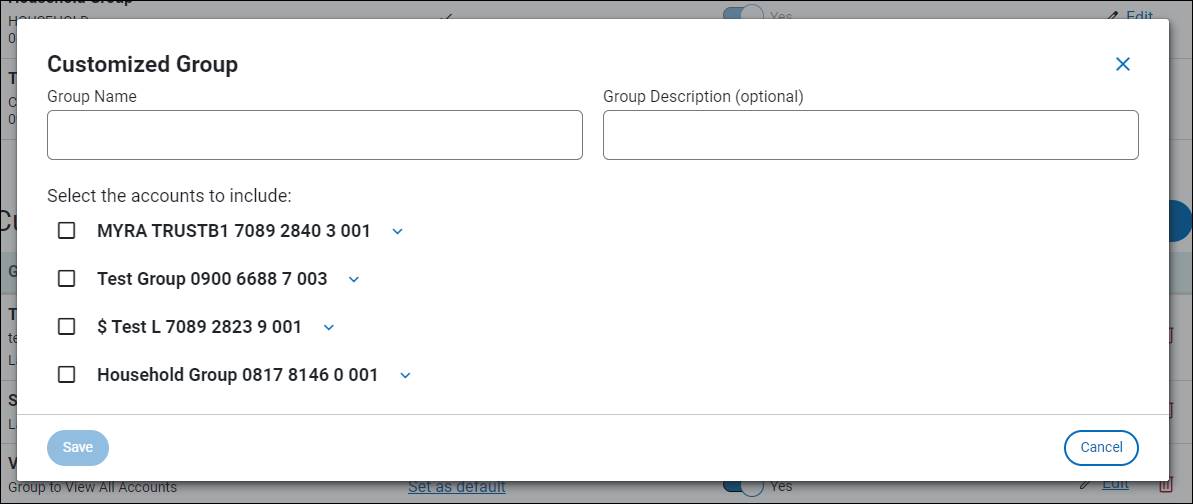
A client can name a customized group, give it an optional description, and select which accounts to include in the group. Every single element on this simple screen was discussed and carefully considered:
- The name “customized group” itself
- The field labels that are above the fields (not inside the fields)
- The “optional” marker in the field label
- The subheader content, style, and punctuation
- The design of the drop-down menus, including text formatting, checkbox style, carat, etc.
- The placement, style, and microcopy for the three buttons
It looks simple and easy to use because a lot of thought went into it.
Navigation menu
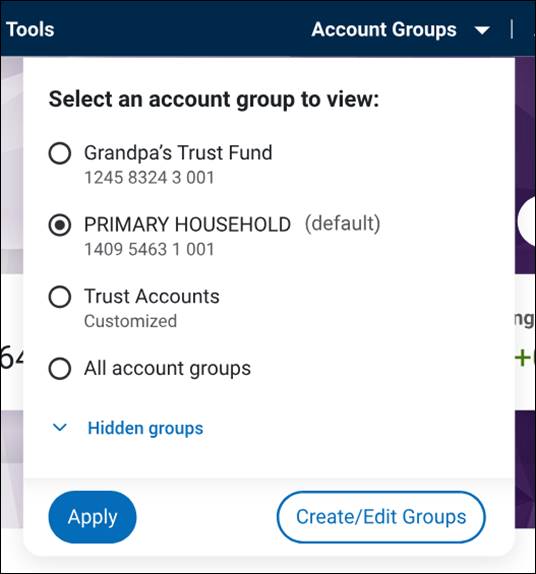
This simple navigation menu is also the result of a lot of thought, discussion, and iteration. Here, too, every single element that you see was considered as it relates to the rest of the site’s navigation and the rest of the “account groups” experience:
- The “Account Groups” label and carat style
- The instructive header inside the menu, including style, format, and punctuation
- The content placement and style of each group type:
- Ameriprise groups include group numbers
- Customized groups are marked as such
- Default group is marked clearly but simply (matching the style we use for “optional” labels)
- The placement, and style for the “all groups” option
- The design and functionality of the “hidden groups” toggle
- The microcopy for the navigation menu label, the “all/hidden” options, and the buttons
Again, it looks simple and integrates seamlessly with the rest of the “Account Groups” experience because every single element was carefully considered.
